How do I move a child from the waiting list to the regular roll?
To view a video clip of this procedure, click

1. Go to the "Child Selection" screen by clicking on the "Children" link in the menu bar
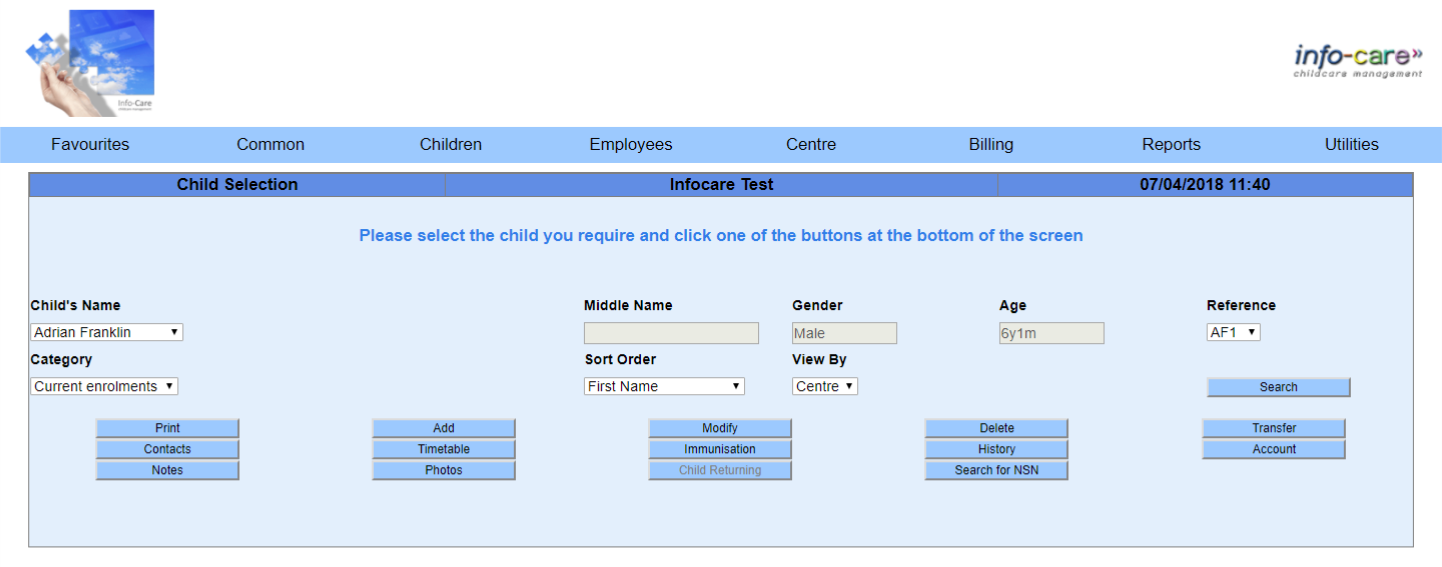
2. Select the category "Waiting list" and click "Search"
3. Select the child's name from the drop down list and then click "Timetable"
4. Scroll to the bottom of the screen and click "Add"
5. Enter the "Effective Date" as the date this new timetable will start from - you can enter timetables in as far in advance as you like
6. Select the appropriate funding type for this timetable. “Normal funding” is the default with “Casual funding” and “No funding” as other options
7. Ensure that the correct "Fee Structure" has been selected for this timetable
8. Load any discounts if applicable
9. Update any of the tick boxes based on the criteria below:
If the child meets the criteria of being exempt from the Ministry of Education's absence rules (refer to the Funding Handbook), put a tick in the "Special needs (EC12/13) box
If the child is over 3 and you are assigning 20 hours ECE on this timetable, you have the option of using the "Claim optimum 20 hours ECE tick box. If you tick this box, the system will look at the child's booked time and work out the optimum attested hours for each day of the week. The hours will be assigned when you click "Update"
If the child is entitled to 20 hours ECE and the parent are sharing hours between your centre and another centre, tick the box beside "Getting 20 hours ECE elsewhere". Please note that if you tick this box, you will not be able to click the "Claim optimum 20 hours ECE" as well

10. Enter the child's "Enrolled Times" by selecting the hours in the appropriate drop down boxes or select a "Session"
If the child will be enrolled for the same hours every day of the week, click "As for Monday" and the times will copy across
11. If the child is eligable to received 20 hours ECE funding and the hours are not being optimised, select the number of hours to be claimed each day in the "20 Hrs ECE" row below the days of the week
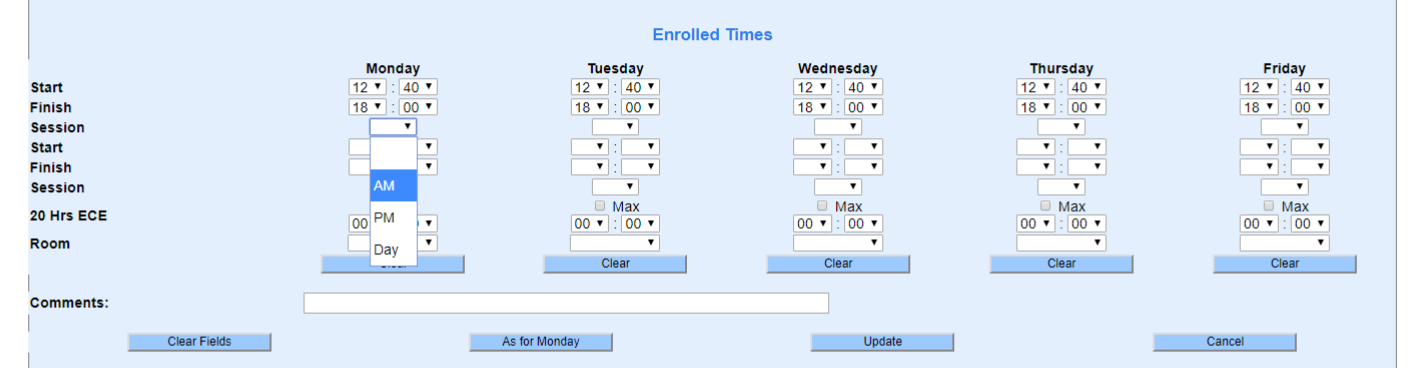
12. Once you have entered all if the child's enrolment information, click "Update"
13. When back in the "Child Selection" screen, click "Modify"
14. Update all of the child's information including "Birth Date", "Application Date" and "Starting Date" and if required, their "Leaving Date"
15. In the "Attendance: select "Regular enrolment - child booked and attending on a regular ongoing basis"
16. Click "Update"
17. Click "Account"
If the information is not correct, click "Modify" to update the "Invoice whom" to the billparys relations as loaded in the "Contacts"; or click "Previous"
18. Update the child's contact information by following the "Hoe do I modify a contact for a child" and "How do I add a contact for a child" modules